


Post by Kelly on Oct 28, 2019 16:23:19 GMT
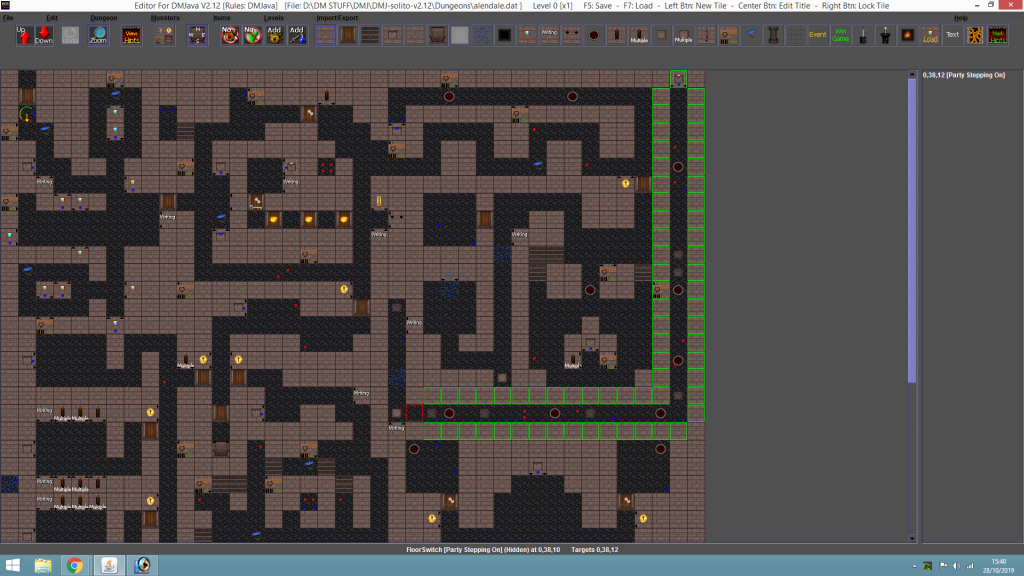
Here's a glimpse of the first level of Alan Berfield's Dungeon from the original DMJava pack.
It looks a little daunting at first, lots of things going on here!
Let's talk you through it...

Here are the icons in the editor you'll want to get the hang of first.
First you have your solid ordinary wall. Simply click and "paint" it around to design a room. Simple!
Then try adding a door. Click the door icon and a new window will appear. Simply choose which door you'd like and which way it opens - should it be up and down, or side to side. Also be sure it's facing the right way!
The alcove icon simply lets you create an alcove in your wall.
If it's a single sided alcove, set the direction you want it to face. If it's a 4-sided then this option is voided out.
The next icon you see is a fountain - same principle, have it facing the right way.
Stairs is next. Only the down is highlighted right now for you to make a level below.
Teleporters can be tricky to get the hang of at first, try loading up some example dungeons and follow the mechanisms.
If you only want the party (your team) to be effected, simply click party and leave the rest blank - sames goes for the rest.
If you select them all, then everything will be effected.
Example, you might want to throw an item into the teleporter, but if the party steps into it nothing happens - then you select only items and so fourth.
The next icon is pits. This basically speaks for itself.
The mirror icon is the champions mirror from which you choose your champions.
The writing icon when selected shows several lines of text that can be used, for example "Riddle Room".
The two holes there is the launcher. Be sure you have it facing the way you want, and it can launch spells or items out of either hole or both.
Usually activated by floor switches or wall switches after a certain task is performed.
The red circle is the monster generator . This spawns your monsters anywhere in the dungeon when activated. Choose how many to spawn and when - be sure to deactivate it when it's preformed it's task or you'll have monster generating continuously!
The single lever is a single switch activator that perform a single task, for example, closes a pit or opens a door elsewhere.
The multiple lever is where things get interesting. From here you can perform a number of tasks from a single switch.
Here's a preview of a simple mechanism...

See the green lines - this means I've set it up to open the door and also replaces the wall for a floor to gain access to the alcove behind it.
The alcove holds the key, to open the second door that lies beyond.
The next two icons show single floor switches and multiple floor switches - the same principle applies, it's just activated when stepped on - either by the party, monster or items
The torch sconce, is just that, sconce decoration which can be a switch if desired. For example, remove the torch and it opens a nearby door, or worse activates a launcher or opens a pit, etc...
The next icon is wall decoration, which again can be a switch if desired. Ideal if you want to hide something the cracks of the wall perhaps.
The puddle is floor decoration.
The pillar is for additional decoration, like pillars, trees, boulders...etc.
And next to the pillar icon there we have invisible walls.
These are main mechanisms you'll probably use the most, so spend some time getting the hang of them.
Need more help - then pop a post below!
